nd I learned the importance of clean audio the day my camera picked up more refrigerator hum than my actual voice. That’s when I started searching for the best budget boom mic for videos, and honestly, I wish I had done it sooner.
Once I set up a simple boom mic system with the right accessories, my videos instantly felt cleaner, clearer, and way more professional.
The best part? I didn’t overspend or get lost in complicated gear talk. I just built a practical setup that fits my daily workflow.
What Should You Look for When Choosing the Best Budget Boom Mic for Videos?

I always start by thinking about how I film. If I shoot indoors, I want a mic that stays steady, stays close, and picks up as little background noise as possible. If I film outside, wind protection becomes my entire personality. The right mic performs well in both scenarios, and you don’t need a huge budget to make that happen.
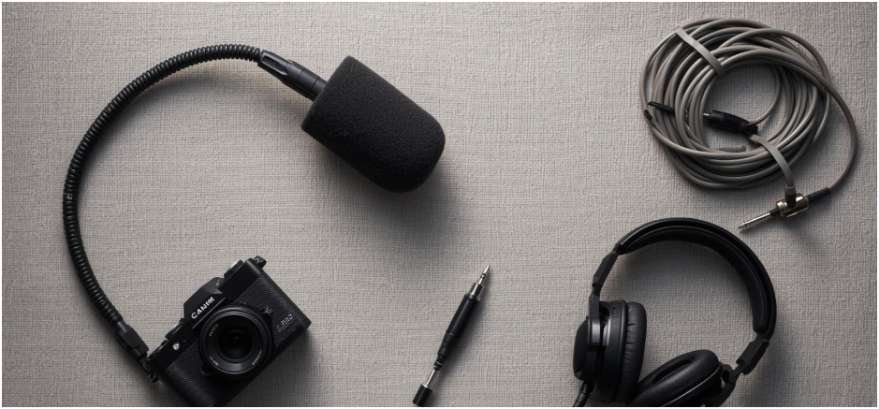
The Boya BY-MM1 sits squarely in the under-$50 range and works with both cameras and smartphones.
It comes with TRS and TRRS cables, so I never worry about compatibility. The Audio-Technica AT875R bumps the quality up with an XLR connection and a tighter pickup pattern.
For a more pro-leaning option, the Sennheiser MKE 600 gives a clean, natural tone and handles different environments with ease. All three mics cover different budget levels, so the “best” one really depends on how you shoot.
I test every mic by recording simple voice clips in the same room. If a mic doesn’t handle HVAC noise, keyboard clicks, or traffic hum, I move on. A good boom mic captures your voice clearly and confidently without chasing expensive gear upgrades.
What Accessories Do You Actually Need for the Best Budget Boom Mic for Videos?

When I built my first boom mic setup, I kept the accessory list simple. I wanted a system that felt easy to move around and wouldn’t overwhelm me every time I recorded. After months of testing, these essentials always make the biggest difference.
A boom arm or boom pole helps position the mic at the perfect angle. Indoors, a desk boom arm keeps my space clean and my mic off the table. Outdoors, I use a lightweight pole so I can position the mic right outside my frame. I avoid bulky setups, because the point of a budget system is simplicity.
A shock mount comes next. It suspends the mic so desk bumps, cable movements, or tiny vibrations don’t ruin the recording. Many budget mics include a basic shock mount, but I check sizing and thread compatibility because nothing feels more frustrating than mismatched hardware.
I also keep both a foam windscreen and a furry windshield in my kit. Foam handles indoor plosives, while the furry cover fights wind like a champ. I don’t shoot outdoors without one — I made that mistake once, and the wind noise was basically comedic.
For cables, I choose the correct ones based on the mic. 3.5mm mics need TRS or TRRS. XLR mics need balanced XLR cables. If I use an XLR mic, I also plug into an audio interface or recorder with phantom power. The Sennheiser MKE 600 gives me flexibility because it can run on an AA battery when I don’t have phantom power nearby.
How Do These Budget Boom Mics Compare in Real Use?

Here’s the comparison table I wish I had when I started. It sums up the three most popular budget-friendly options.
| Feature | Boya BY-MM1 | Audio-Technica AT875R | Sennheiser MKE 600 |
| Price (US) | $40–$50 | $169–$189 | $329–$350 |
| Connection | 3.5mm (TRS/TRRS) | XLR | XLR (or AA battery) |
| Pattern | Cardioid | Line + Gradient Shotgun | Super-cardioid/Lobar |
| Power | Plug-in power | Phantom power | Phantom or AA |
| Best For | Beginners, phones, vlogging | Indie filmmakers | Serious creators |
| Pros | Affordable, plug-and-play | Compact, directional | Pro tone, low noise |
| Cons | Higher self-noise | Needs interface | Higher price point |
I rotate between these depending on my project. When I’m doing quick vlogs or casual videos, the BY-MM1 saves time and still sounds good, and when I need directional control and a tighter pickup pattern, the AT875R steps in. When I want everything — clean tone, durability, and low noise — the MKE 600 gets the job.
What’s the Best Way to Use These Mics for Cleaner Daily Audio?

I keep my boom mic just above the frame, pointed toward my chest, not my forehead. This gives me a clearer sound and reduces echo. I also control my recording environment. I turn off fans, close windows, and add soft items like curtains or rugs to absorb reflections. These small habits make budget mics sound far more expensive than they are.
When I shoot outdoors, I rely heavily on the furry windshield and try to face away from strong wind. I monitor audio with headphones every time, because I want to catch issues early instead of reshooting. These little routines save so much frustration.
If you use an XLR mic, you can experiment with gain levels. I keep gain low and speak comfortably so the mic captures detail without clipping. With 3.5mm mics, I check my camera settings and lock my audio levels so I don’t deal with random volume jumps.
FAQs
1. Do I need an audio interface for a budget boom mic?
If your mic uses XLR, you need either a recorder, a camera with XLR inputs, or an audio interface that provides phantom power. If you use a 3.5mm mic like the Boya BY-MM1, you can plug directly into your camera or smartphone without an interface. I choose based on where and how I film that day.
2. Can I use a boom mic with a smartphone?
Yes. You just need the correct cable. TRRS works with most phones, but newer models may need a USB-C or Lightning adapter. I’ve used the BY-MM1 with my phone many times, and the improvement always surprises me.
3. How close should the boom mic be to sound good?
I usually keep it 6–12 inches away from my face, just outside the camera frame. Closer placement gives a stronger, cleaner sound without raising the gain too high.
4. Does wind ruin audio even with a budget mic?
It can, which is why I never film outdoors without a furry windshield. Foam alone won’t protect against real wind. Once I switched to furry covers, my outdoor audio improved immediately.
Where I Leave You: My “Keep It Simple” Audio Upgrade Rule
I treat audio like cooking with good ingredients. You don’t need fancy tools to make something great — you just need the right basics.
The best budget boom mic for videos becomes far more powerful when you pair it with a boom arm, a shock mount, proper cables, and the right windshield.
Once you set up a system that fits your shooting style, clean audio becomes the most effortless part of your workflow.
Start simple, stay consistent, and treat your mic like a teammate. Your videos will feel more polished long before your gear gets “expensive.”